WordPress, being one of the most popular website platforms, often becomes a target for hackers. Malware attacks are not only disruptive but can also damage your website’s reputation. Most WordPress malware is stealthy, allowing infections to persist unnoticed for long periods. However, some symptoms, such as redirect hacks or admin panel lockouts, can give away the presence of malware.
In this guide, we’ll focus on detecting and removing malware, specifically within your MySQL database.
Symptoms of WordPress Malware Infection
Identifying the signs of malware is the first step. Here are common symptoms:
- Unexpected Website Redirects: Your site suddenly redirects to spammy or malicious websites.
- Locked Admin Panel: You cannot log in to your WordPress admin.
- Unauthorized Users or Content: New users, posts, or scripts appear without your consent.
- Unusual Traffic Patterns: Traffic spikes or a large number of requests to unknown URLs.
- Modified Files: Core WordPress files, themes, or plugins contain unfamiliar code.
- SEO Spam: Spammy keywords or links appear in your site’s search engine results.
If you notice any of these, it’s crucial to act immediately.
Step 1: Backup Your Files and Database
Always begin by backing up your entire WordPress installation, including:
- Files: WordPress core, theme files, plugins, uploads, etc.
- Database: Use tools like phpMyAdmin or WP-CLI to export your database.
Tip: Store backups securely and test them to ensure they’re not corrupted.
Step 2: Enable Maintenance Mode
While cleaning your site, it’s important to prevent visitors or bots from interacting with your site. Use a maintenance mode plugin or add the following code to your functions.php file:
function maintenance_mode() {
    if ( !current_user_can( 'edit_themes' ) || !is_user_logged_in() ) {
        wp_die('<h1>Maintenance Mode</h1><p>The site is undergoing maintenance. Please check back later.</p>');
    }
}
add_action('get_header', 'maintenance_mode');
Step 3: Clean Infected Files
Malware often resides in theme or plugin files. Here’s how to clean them:
- Manually Inspect Files:
- Look for unfamiliar
.phpor.jsfiles in thewp-content/uploadsfolder. - Search for suspicious code in
functions.phpor theme/plugin files.
- Look for unfamiliar
- Restore Clean Versions:
- Replace infected core files with fresh ones from the official WordPress repository.
- Reinstall plugins and themes after downloading them from trusted sources.
- Scan for Malware:
Use a security plugin like Wordfence or Sucuri to scan your WordPress installation for infected files.
Step 4: Clean Your Database
Malicious code is often injected into your WordPress database. Here’s how to clean it:
Step 4.1: Find Malicious Entries
Use this query to identify malware in the wp_posts table:
SELECT * FROM `wp_posts` WHERE `post_content` REGEXP '<script.*?>.*?</script>';
Check other tables like wp_options, wp_users, or plugin-specific tables for suspicious entries:
SELECT * FROM `wp_options` WHERE `option_value` REGEXP '<script.*?>.*?</script>';
Step 4.2: Remove Malicious Code
Once identified, you can remove it using queries like:
UPDATE `wp_posts` SET `post_content`= REGEXP_REPLACE(`post_content`, '<script.*?>.*?</script>', '');
Note: If the malicious code is embedded within a longer string, you may need more specific regex patterns.
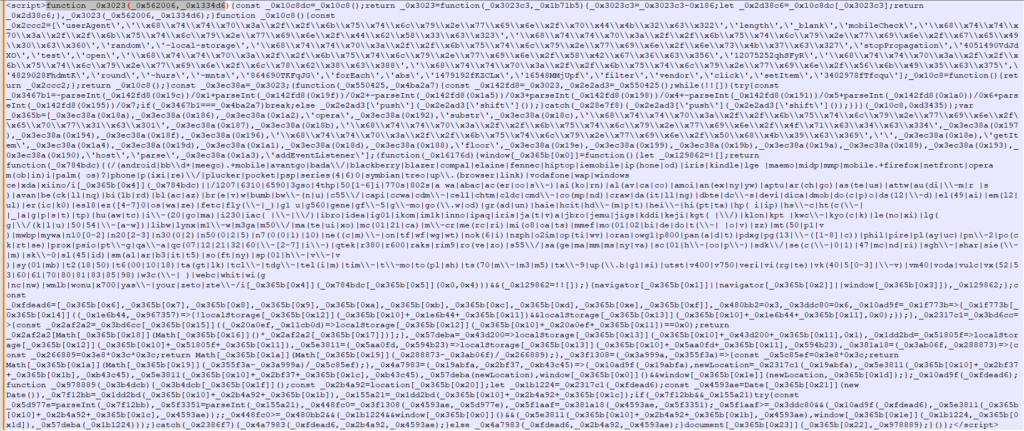
Step 4.2.1: To specifically target – Malicious Code
To specifically target and remove malicious script entries that start with <script>function _0x3023(_0x562006,_0x1334d6){ in the wp_posts table, you can update your SQL query as follows:
Query to Identify Malicious Entries:
SELECT * FROM `wp_posts` WHERE `post_content` REGEXP '<script>function _0x3023\\(.*?\\)\\{.*?</script>';
This query searches for entries in the post_content column where the malicious script starts with <script>function _0x3023( and ends with </script>.
Query to Remove Malicious Entries:
UPDATE `wp_posts`
SET `post_content` = REGEXP_REPLACE(`post_content`, '<script>function _0x3023\\(.*?\\)\\{.*?</script>', '');
Explanation of the Regex:
<script>: Matches the opening<script>tag.function _0x3023\\(: Matchesfunction _0x3023(. The backslashes\\escape the parentheses to treat them as literal..*?: Matches any characters (non-greedy) that may appear afterfunction _0x3023(.\\): Matches the closing parenthesis of the function arguments.\\{: Matches the opening curly brace{of the function body..*?</script>: Matches the rest of the script up to and including the closing</script>tag.
Precautions:
- Backup First: Always create a backup of your database before running UPDATE queries.
- Test on Sample Data: Run the
SELECTquery first to ensure it identifies only the malicious entries. - Check for Variations: If the malicious script varies slightly, refine the regex to account for those variations.
Step 4.3: Remove Unused Data
- Delete unused plugins and themes, as they may contain vulnerabilities.
- Clear unused user accounts and suspicious database entries.
Step 4.4: Secure Database Permissions
Limit database user privileges to only those required for WordPress to function (e.g., SELECT, INSERT, UPDATE, DELETE). Avoid granting DROP or ALTER permissions unless necessary.
Step 5: Update and Secure Your Website
- Update Everything:
- Update WordPress core, themes, and plugins.
- Use only trusted sources for downloads.
- Install Security Plugins:
- Use plugins like iThemes Security, Sucuri Security, or Wordfence to monitor your site.
- Change All Passwords:
- Update passwords for WordPress admin, database, FTP, and hosting accounts. Use strong, unique passwords.
- Enable Two-Factor Authentication (2FA):
Add an extra layer of protection for your admin account. - Install a Web Application Firewall (WAF):
Services like Cloudflare or Sucuri Firewall can help block malicious traffic before it reaches your site. - Monitor Your Site:
Regularly scan your website for vulnerabilities and malware using automated tools or plugins.
Bonus Tip: Prevent Future Attacks
- Regular Backups: Use tools like UpdraftPlus or Jetpack for scheduled backups.
- Limit Login Attempts: Prevent brute force attacks with a plugin like Login LockDown.
- Disable XML-RPC: Unless needed, disable it to reduce attack vectors.
- File Permissions: Set correct file permissions (e.g.,
755for folders and644for files).
Conclusion
WordPress malware infections can be challenging, but with a systematic approach, you can clean your site effectively. Regular maintenance and security measures can prevent infections and minimize downtime.
In our next post, we’ll dive deeper into cleaning infected files and securing your WordPress installation to avoid future attacks. Stay tuned!


